● Event Page: Manages and configures events. Multiple events can be created, and the parameters of each event can be configured. The software executes operations based on the current event while running.
● Al Page: Real-time capture and recognition of runners and bib numbers. lt can also import existing videos for processing.
● Review Page: Displays all recognition and detection results for the current event, presented as small images of the runners. These results can be filtered, modified, or deleted.
I. Event Page

Create an event or use the default event.


1. Set the number of characters of the bib number and whether it includes the first letter. If there is no first letter, leave this option blank.


2. Correctly set the event's start time. If "Display Gun Time Result" is enabled, the times in subsequent pages will subtract the start time.

II. AI Page
● Shoot runners from the front. Every runner passing through the frame will be tracked in real-time and 2 to 3 images will be saved.
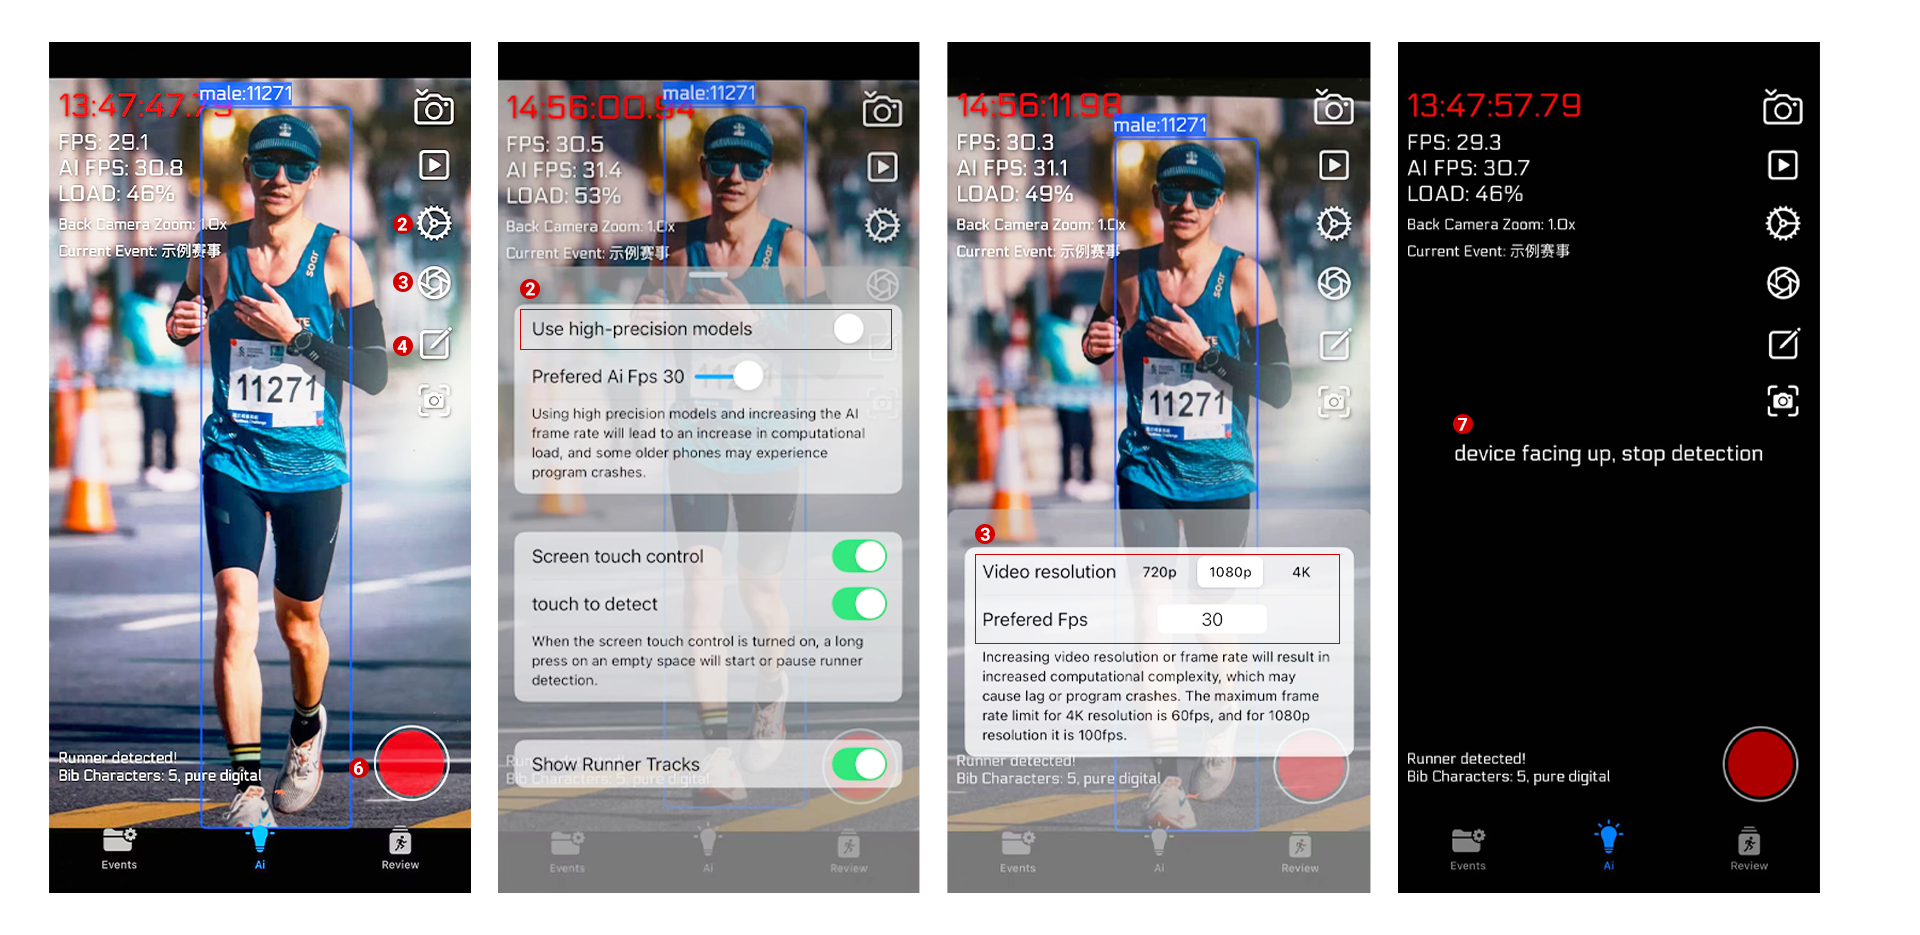
- You can control the camera's field of view by pinching the screen with two fingers.
- The gear button in the top right corner can be used to configure whether to use a high-precision model and other settings.
- The shutter button in the top right corner sets the video resolution and frame rate.
- The brush button in the top right corner allows you to manually draw a red finish line, marking the timing moment at the current location. The time will be automatically recorded when runners cross this line.
- Press and hold the empty area of the screen to control starting and pausing runner detection.
- Press the button in the bottom right corner to start recording the video. lf the resolution is 4K, the video size will be very large, so be mindful of your phone's storage space.
- When the device is placed flat on the table, runner detection will stop to save power.
- Usually, there is no need to record the screen because the software has already detected and saved all passing runners as images.

● Indicators on the screen
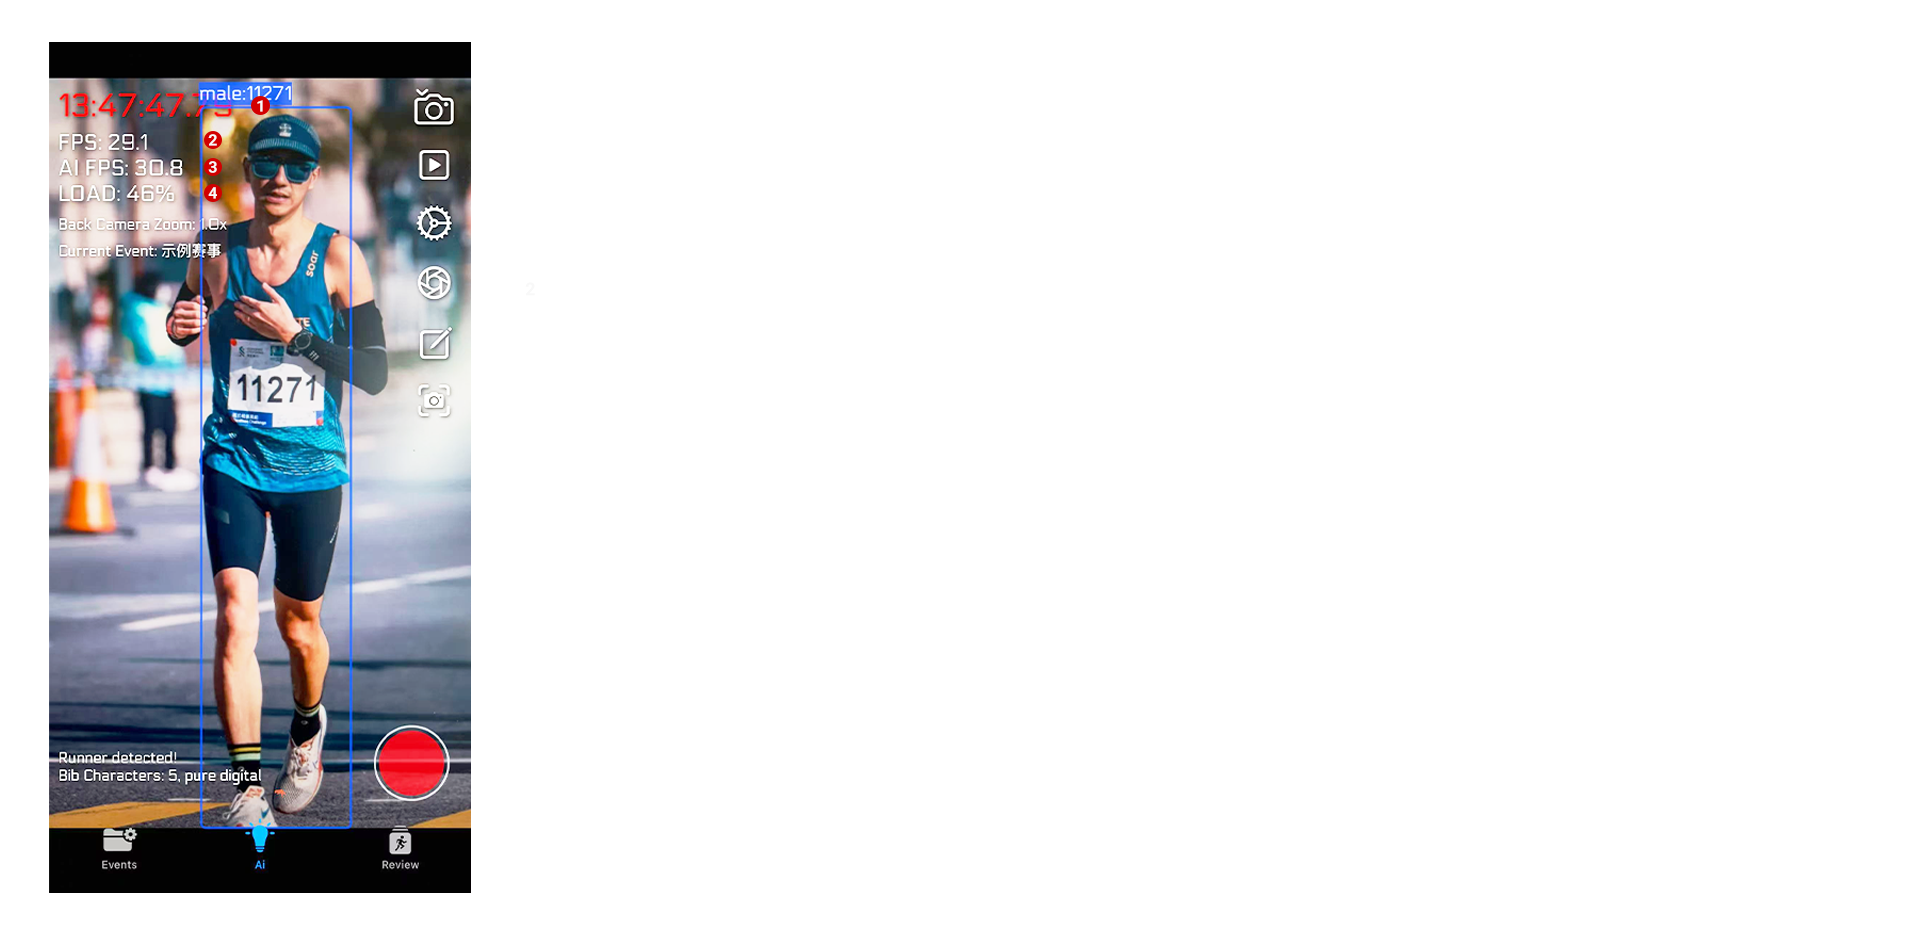
- Red Time: The current time. If "Display Gun Time Result" is enabled in the event settings, it will show the time elapsed from the gunshot to the current time.
- FPS: The frame rate at which the video is captured, i.e., the number of frames the camera captures per second.
- AI FPS: The frame rate at which the video AI processes frames. The AI frame rate will not exceed the camera frame rate is high, the AI will drop some frames to reduce the computation load.
- LOAD: The proportion of phone performance occupied by AI calculations. If it approaches or exceeds 100%, the program may crash due to excessive computation.

● By touching the button in the top right corner of the AI Page, you can enter the video review page. By loading the video, it will extract all runners and their bib number information from the video.
- Before loading the video, the start time of the first frame of the video should be set, so that each frame of the video is linked to the correct event time, thus obtaining each runner's correct time.
- By touching the start and pause button in the top right corner, you can start or pause the video review.
- Similarly, a timing line can be drawn, and the time wil be recorded when runners cross it.
- Each playback run will result into a run record, which can be seen by touch the folder button. You can change the time on the images by resetting the time of one image, and all the times on the images from the same playback will be changed.
- You can export the images extracted from the video playback to the review page.

III. Review Page
● You can search and review runner images.
- Generally, 3 images are recorded for each runner passing through the screen: the first image when the runner detected, the image when the runner crosses the timing line, and the last image before the runner leaves the frame.
- The red flag at the bottom left of the image indicates that this image is of the runner touching the timing line, and the corresponding time is the crossing time.

● When using bibs in the following styles, the recognition rate will be optimal, usually reaching over 98%:
- A bib that is 24 cm (9.45 inches) wide and 16 cm (6.30 inches) high.
- The race number is in the center of the bib, spanning the entire bib.
- The bib's character area has a dark background color, with the race number characters in a light color.
- The race number consists of 4 pure digits, without letters.

IV. Device Support
The AI functionality has high computational requirements for the phone, especially when using high-precision models or enabling 4K resolution.
Here are the results from tested devices. There are two operational states:
- Basic Operation: No high-precision models used, resolution set to 720p.
- High Load Operation: High-precision models used, resolution set to 4K.


V. iPad Performance Test Results
- The iPad is equipped with the A16 Bionic chip.
- At a resolution of 1080p and a frame rate of 60~100 fps, the system ensures smooth and real-time recognition of runners and bib numbers in the footage without any lag.
- At a resolution of 4K and a frame rate of 30 fps, it maintains smooth recognition of runners and bib numbers. However, when the frame rate is increased to 60 fps, the system can generally identify athletes in the frame, but the detection bounding box exhibits latency during motion.


VI. Features Under Development
The following new features are under development and will be updated after testing:
- Optimization of runner identification, tracking, and race bib recognition algorithms.
- Race bib recognition without preset character numbers.
- Real-time data sharing and wireless distributed computing with multiple phones.
- Automatic generation of runner photos and short videos.
