I. Mini-Program
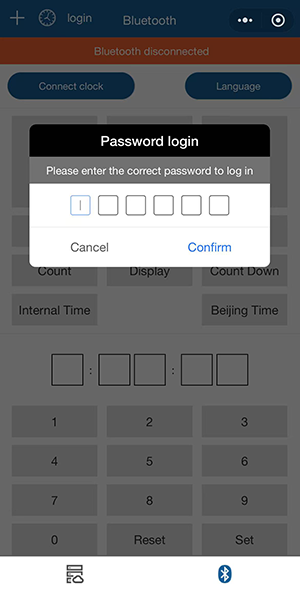
1. Login with a password to prevent unauthorized operations by others. The password can be obtained from the Run8 Cloud timing backend. The password changes every 24 hours, but it can also be manually modified for timely updates.
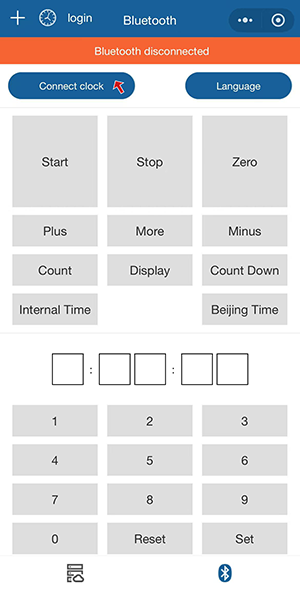
2. Turn on the clock, then click to connect to the clock via Bluetooth. You can connect to multiple nearby clocks that need to be controlled one by one.
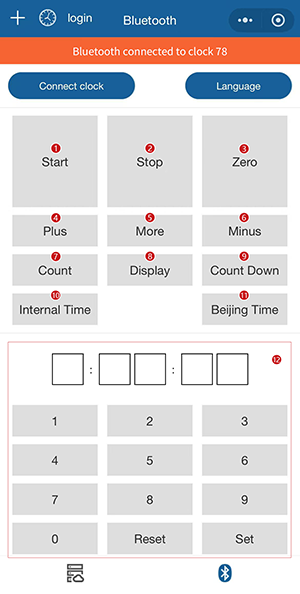
3. After successfully connecting the Bluetooth of the clock, the red area in the top left corner will display that the Bluetooth is connected to the "xxx" clock. You can control the clock's display and show the required time information using the software feature buttons.
Notes:
- Click the "Start" button, and the clock will start counting forward.
- Click the "Stop" button, and the clock will stop at its current state.
- Click the "Zero" button, and the clock will reset to zero, displaying 0:00:00.
- Click the "Plus" button, and the clock will add one second to its current time.
- Click the "More" button, and the clock will add or subtract time in its current state.
- Click the "Minus" button, and the clock will subtract one second from its current time.
- Click to enter the count-up operation.
- Click to enter the appearance operation.
- Click to enter the countdown operation.
- Display internal time.
- Display Beijing time.
- Enter a valid time in the time logic within the dial frame and click the set dial button to display the time information you set.
II. APP
1. Enter the clock (Event Timing) APP and go to the main interface.
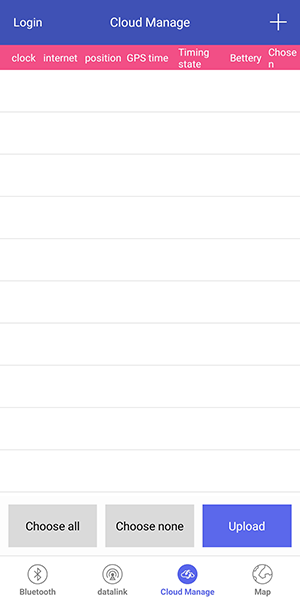
2. Click the "Cloud Manage" button in the bottom-right corner to proceed to the next step.
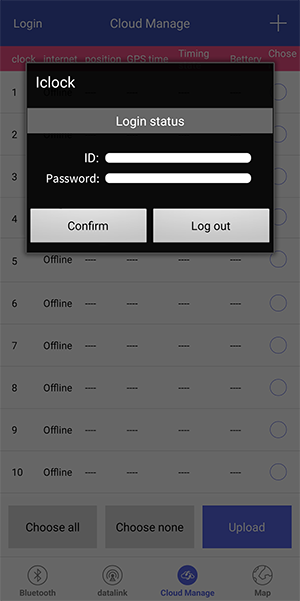
3. Click "Login" in the top-left corner and enter the account username and password, e.g., username: 2020shmls, password: 123456.
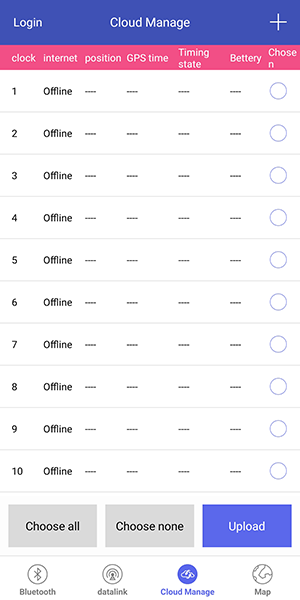
4. After entering the account username and password, you can see all the clocks under this account.
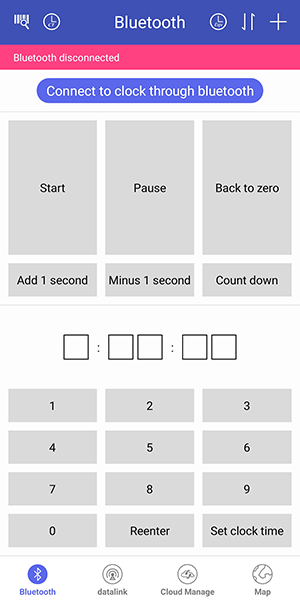
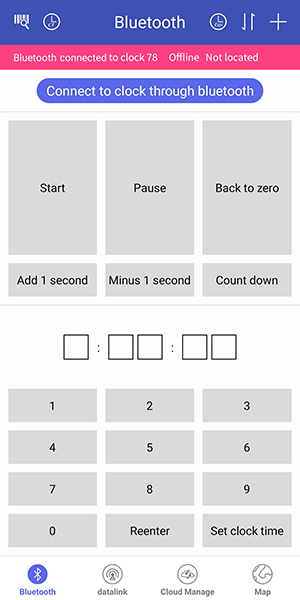
5. Click the "Bluetooth" option in the bottom-left corner, then click the button to connect to the clock via Bluetooth to proceed to the next step.

6. Once the clock you need to control is connected and the connection is successful, you can use the feature buttons in the APP to control the clock.
Notes:
- Click the "Start" button, and the clock's display starts counting upwards.
- Click the "Pause" button, and the clock's display stops at the current time.
- Click the "Back to zero" button, and the clock's display will reset immediately, showing 0:00:00.
- Click the "Add 1 second" button, and the clock's display will add 1 second to the current time.
- Click the "Minus 1 second" button, and the clock's display will subtract 1 second from the current time.
- Click the "equivalent start time" button, set the time for the event start signal, and the clock will start counting from the set time.
- Enter a valid time value inside the clock display frame, click the set display button, and the time information you set will be displayed. Enter one of the following commands: "92221," "92222," or "92223," then click the set display button. After clicking the start gun signal button, it can be used to synchronize with the start gun and the clock. After synchronization, the start gun will control the corresponding timer. A single clock can be synchronized with up to three starting guns, and all three synchronized starting guns can control the clock.
- When the clock is counting or paused, click the countdown button, and the clock will start counting down. The clock will stop when it reaches 0:00:00.
- Timer result display feature: The clock connects to a UHF chip reader, reads the UHF electronic tag EPC code information, and accesses the Run8 Cloud timing backend via the Bluetooth-connected mobile APP. The clock will display the finish results corresponding to the UHF tag. You can also manually input the runner's number to display the corresponding results.
- Equivalent start time: Input the start time in Beijing Time and click to start the clock from that time. The clock will display the elapsed time since the start time.
- Sleep the clock: Put the clock into low-power mode, and it can only be operated after being woken up.
- Deep sleep: Put the clock into low-power mode and turn off the clock's network. It can only be operated after being woken up.
- Wake up the clock: Wake up the clock from its sleep state.
- Scheduled wake-up: After the clcok is in sleep mode, you can schedule it to automatically wake up after a certain period. This can be used for deep sleep or normal sleep mode to wake up the clock.
- Soft reboot of the clock: Reboot the main program of the clock.
- Refresh display: Push all digital segments of the clock to refresh them.
- Test display: Test all digital displays (0-9) to check if the digital segments are working properly.
- Countdown to the target time: Select a time after the current time, and the clock will count down to that time and reset to zero or start counting upwards.
- Display 12/24 hour format: Switch between 12-hour and 24-hour time display modes for the clock.
- Sync the phone time with the clock: Use the current Beijing Time of the phone to synchronize with the clock. This is commonly used to synchronize the reference time across multiple clocks.
- Data chain: After connecting the data chain and the mobile APP, you can synchronize or unsynchronize the data chain with the clock via Bluetooth. The data chain can control the clocks it is synchronized with, and unsynchronized data chains cannot control the clock. The synchronized data chain can control multiple clocks within its range. The range is wide, and the connection is stable, commonly used for timing the start and finish points of large-scale events.
- Map: In the map interface, click "Global Settings" in the top-left corner to set the 5/6-digit display and 12/24-hour time format.
