I. Main Interface
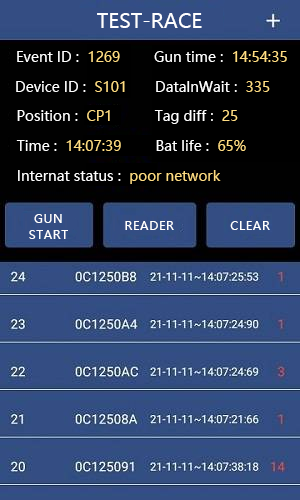
- Event ID: After clicking to download event information, the event ID in the Run8 Cloud Timing backend will be displayed.
- Gun Time: Clicking the "GUN START" button will record the gun time for the current event.
- Device ID: The number of the device.
- DatalnWait: Data that has been read but not uploaded to the timing backend.
- Position: The name of the timing point set for this device in the timing backend.
- Tag Diff: The number of different tags read by the handheld reader.
- Time: The real-time clock of the device.
- Bat life: Displays the current bat life of the device.
- Internat status: The internat status of the device. Data upload may slow down when the network is poor.
- Gun START Button: After clicking the "GUN START" button, the gun time will be displayed.
- READER: The device will start reading after a long press.
- CLEAR: Clicking this button will clear the device's current displayed reading result list, and the count of different tags will also be reset to 0.

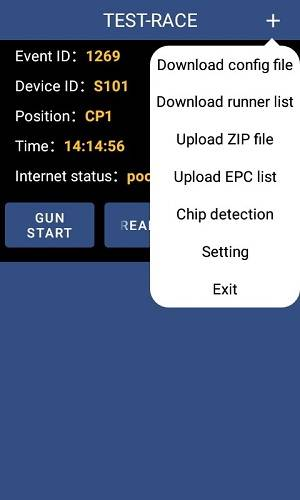
II. More Feature Interface
After clicking the "+" button, some basic features of the interface will be displayed.
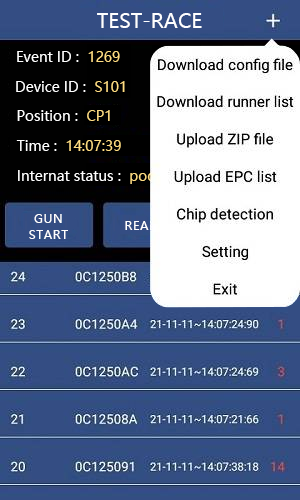
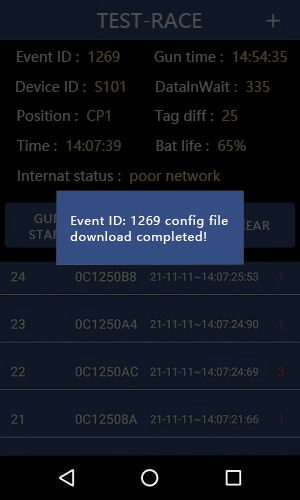
1. Download Config File
Automatically download config information from the backend based on the event rules set in the timing backend.
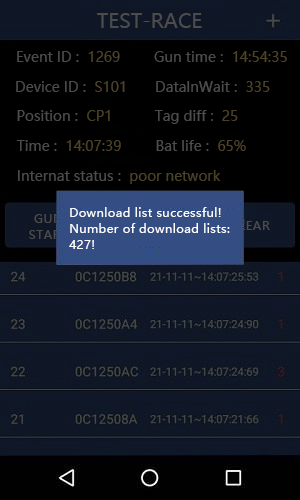
2. Download Event List
Download the event list information for the event from the timing backend.
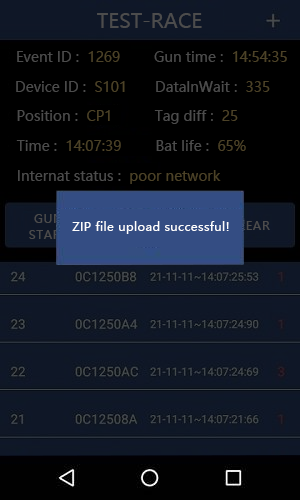
3. Upload ZIP File
Package the EPC data read by the device into a compressed file and automatically poll to upload it to the RUN8 Cloud backend every 5 minutes. If there are special situations where the backend cannot find the compressed file, you can manually click the "ZIP File Upload" to transfer the compressed file to the timing backend.
4. Real-time EPC Upload
After clicking the "Real-time EPC Upload" button, the currently read EPC will be immediately uploaded. By default, the upload is triggered when 50 EPCs are read or when no tag data is received within five minutes.
5. Chip Detection
After clicking the scan button, the EPC chip information scanned will be displayed on the device. If the EPC number does not correspond to a participant number in the list, only the EPC code read will be displayed. The chip detection feature cannot be used when reading from the main interface. To use it, return to the main interface and stop the reading. A prompt will be displayed as follows:

6. Setting Interface
Click the "setting" button to enter the settings interface.
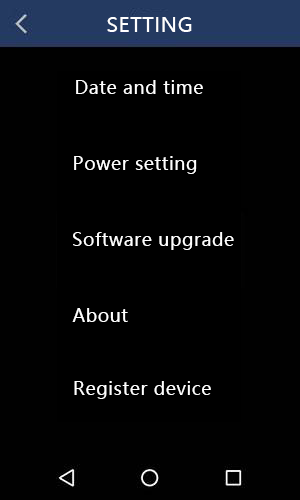
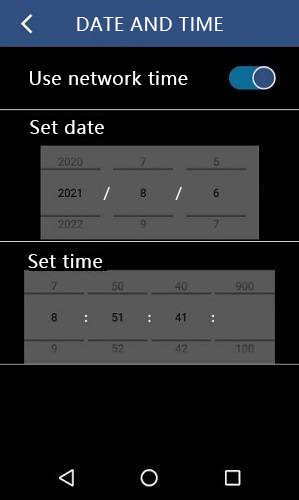
(1)Date and Time
Set the date and time, and you can also retrieve network time. Note: Once the network time button is enabled, the date and time cannot be set manually (the set button disappears). To set the date and time manually, turn off the network time.
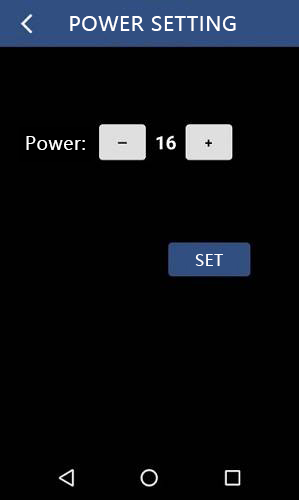
(2)Power Settings
Set the reading power, with the power range (dBm) from 16 to 26. A larger value will increase the reading distance, while a smaller value will decrease it. Correspondingly, a higher power will cause the device to consume more bat. Click the “+/-” button to increase or decrease the power, and click the "SET" button to save.
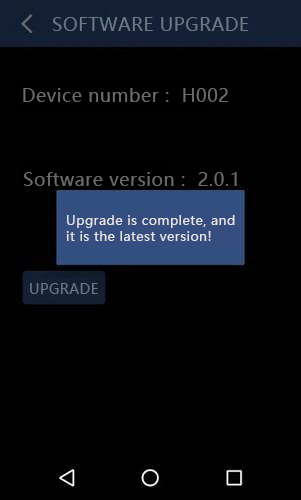
(3)Software Upgrade
Click the "UPGRADE" button, and the system will automatically update to the latest version.
(4)About
Describes the system version, the MAC address of the device, and the author information.

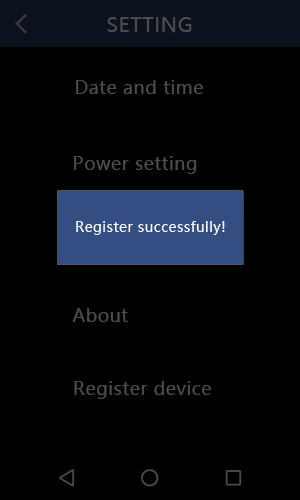
(5)Register Device
When a new device installs the app for the first time, it needs to initiate a registration request to the Feibot backend. After the registration success message appears, the device can be used normally. Note: The device must be connected to the internet before registration.

III. Language Switch
To facilitate the use of the device by international customers, the device language needs to be set. To set the language on an Android system: Settings > Language & Input > Language > English (United States). After setting it, the handheld reader system will automatically switch to the international version backend, and the interface will change to English.